
Last Updated: January 11, 2024
Hard water can be a nuisance. It leaves unsightly spots on your dishes, makes your laundry feel rough, and can even lead to buildup in your pipes. But what if there was a solution you could implement yourself? Enter the DIY water softener. This handy device can transform your hard water into soft, making it more compatible with soap, gentler on your appliances, and better for your home overall.
A DIY water softener is a cost-effective solution to hard water problems in your home. It involves installing a device that reduces mineral content in water, making it softer and better for household use. This guide provides step-by-step instructions for installation.
In this article, we’ll delve into the world of DIY water softeners. We’ll explore what hard water is and why it’s a problem, how water softeners work, and the benefits of installing one in your home. We’ll also provide a detailed guide on how to install a water softener yourself, how to maintain it, and how to troubleshoot common issues.
Whether you’re a seasoned DIY enthusiast or a beginner looking to take on a new project, this guide will equip you with the knowledge and confidence to tackle hard water head-on.
Table of Contents
Key Takeaways
| Hard water, rich in minerals like calcium and magnesium, can cause issues in your home, from plumbing problems to reduced appliance efficiency. |
| Water softeners work on the principle of ion exchange, replacing hard minerals with softer ones. There are several types of water softeners, each with its unique features and benefits. |
| Before installing a water softener, it’s important to test your home’s water, choose the right softener, and gather the necessary tools and materials. |
| The installation process involves several steps, from shutting off the water supply and positioning the softener to connecting it to the water supply, drainage, brine tank, bypass valve, and overflow tube. |
| After installation, turn the water supply back on, run a regeneration cycle, and check for leaks. |
| Regular maintenance of your water softener, including checking salt levels, cleaning and re-bedding resin tanks, and replacing filters, can ensure its long-term efficiency. |
| Common issues with water softeners include decreased water pressure, salt bridges and salt mushing, and resin beads in water lines. Understanding these problems and their solutions can help you troubleshoot effectively. |
| While sodium-based water softeners are effective, they can have an environmental impact. Consider alternatives like potassium chloride softeners, salt-free softeners, or magnetic/electronic softeners. |
| Installing a DIY water softener can improve your water quality, extend the lifespan of your appliances, and enhance your home living experience. With preparation and patience, you can successfully install and maintain your water softener. |
Welcome to the World of DIY Water Softeners
Unmasking the Culprit: Hard Water
Have you ever noticed a chalky residue on your dishes or a filmy layer on your skin after a shower? If so, you’re dealing with a common household enemy: hard water.
Hard water is simply water that’s rich in minerals like calcium and magnesium. While these minerals aren’t harmful to your health, they can wreak havoc on your home and quality of life.
Why You Need a Water Softener
The effects of hard water are more than just skin-deep. Here’s why you should consider installing a DIY water softener:
- Plumbing Problems: Hard water can lead to scale buildup in your pipes, reducing water flow and causing plumbing issues.
- Appliance Efficiency: The minerals in hard water can accumulate in your appliances, reducing their efficiency and lifespan.
- Cleaning Challenges: Hard water can make cleaning a chore, leaving spots on dishes and making laundry feel stiff and scratchy.
- Skin and Hair Health: Hard water can leave your skin feeling dry and your hair dull and lifeless.

| Problem | Effect |
| Plumbing | Scale buildup reduces water flow |
| Appliances | Reduced efficiency and lifespan |
| Cleaning | Spots on dishes, stiff laundry |
| Skin and Hair | Dry skin, dull hair |
Unraveling the Mystery of Water Softeners
The science behind water softeners
Water softeners are fascinating devices that perform a crucial task in our homes. They work on a principle called ‘ion exchange.’ In simple terms, they swap the hard minerals in your water, like calcium and magnesium, with softer ones, usually sodium or potassium.
This process happens in a resin tank filled with tiny resin beads that carry a negative charge. The hard water minerals, which carry a positive charge, are attracted to these beads and stick to them, while the softer minerals are released into the water.
Exploring different types of water softeners
There are several types of water softeners available, each with its unique features and benefits:
- Salt-Based Ion Exchange Softeners: These are the most common type. They use salt and ion-exchange resins to remove hard minerals from your water.
- Salt-Free Water Softeners: Instead of removing hard minerals, these softeners neutralize them so they don’t stick to surfaces. They’re a good option for those on low-sodium diets.
- Dual-Tank Water Softeners: These have two resin tanks, so when one is regenerating, the other can continue to provide soft water.
- Magnetic Water Softeners: These are a newer type of water softener. They create a magnetic field that changes the electromagnetic properties of the calcium-carbonate minerals, reducing their ability to build up.
| Type of Softener | Salt-Based | Salt-Free | Dual-Tank | Magnetic |
| Removes Hard Minerals | Yes | No | Yes | No |
| Continual Soft Water Supply | No | Yes | Yes | Yes |
| Suitable for Low-Sodium Diets | No | Yes | No | Yes |
Benefits of Using a Water Softener
Installing a DIY water softener in your home comes with a host of benefits:
- Improved Water Quality: Soft water lathers better with soap, leaves fewer spots on dishes, and makes your skin and hair feel softer.
- Extended Appliance Lifespan: Hard water can cause scale buildup in your appliances, reducing their efficiency and lifespan. Soft water can help prevent this.
- Less Cleaning: With soft water, you’ll spend less time and effort scrubbing away hard water stains and scale.

Getting Ready for Your DIY Water Softener Installation
Step 1: Is Your Water Hard? Let’s Test It!
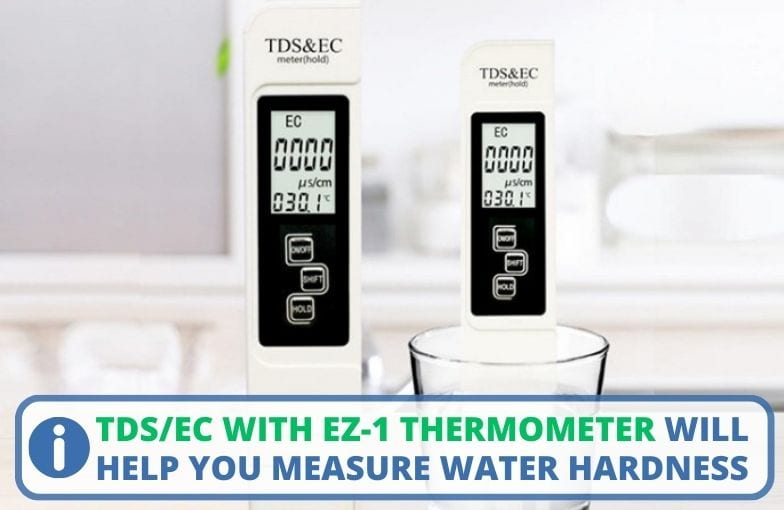
Before you embark on your DIY water softener journey, it’s crucial to confirm that you indeed have hard water. You can do this by purchasing a water testing kit from your local home improvement store or online. This simple test will measure the levels of calcium and magnesium in your water, giving you a clear picture of your water hardness.
Step 2: Picking the Perfect Water Softener
Once you’ve confirmed that you have hard water, the next step is to choose the right water softener for your home. Consider factors like:
- Size: The size of the water softener should match your home’s water usage and hardness level.
- Type: As we discussed earlier, there are several types of water softeners. Choose one that suits your specific needs and preferences.
- Regeneration Style: Some water softeners regenerate based on a timer, while others regenerate based on actual water usage. The latter is usually more efficient.
Step 3: Gather Your Tools and Materials
With your water softener chosen, it’s time to gather the necessary tools and materials for the installation. Here’s a basic list to get you started:
- Adjustable wrenches
- Pipe cutter
- Torch and solder
- Teflon tape
- Flex connectors
- Drain tubing
- Your chosen water softener
| Tools and Materials | Purpose |
| Adjustable wrenches | For tightening and loosening fittings |
| Pipe cutter | For cutting pipes to the correct length |
| Torch and solder | For securing copper fittings |
| Teflon tape | For sealing threaded connections |
| Flex connectors | For connecting the softener to your home’s water supply |
| Drain tubing | For routing discharge water to a drain |
| Water Softener | For softening your home’s water |
Your Step-by-Step Guide to Installing a DIY Water Softener
Step 1: Turn Off Your Water Supply
Safety first! Before starting any work, make sure to shut off the main water supply to your house. Also, turn off the power to your water heater to prevent it from heating an empty tank.
Step 2: Find the Perfect Spot for Your Water Softener
Choose a dry, level location close to your water supply line and near a drain. This will make the installation process easier and more efficient.
Step 3: Connect Your Water Softener to the Water Supply
Now, it’s time to connect your water softener to your home’s water supply. Cut into the main water line and install elbow fittings that will allow you to run two lines to the softener.
Step 4: Set Up the Drain Connection
Next, connect a drain line to the water softener. This line will carry away the hard water minerals during the regeneration process. Make sure the line runs to a suitable drain, sewer, or dry well.
Step 5: Get Your Brine Tank Ready
Fill your brine tank with the appropriate type and amount of salt, following the manufacturer’s instructions. Then, connect the brine tank to the water softener using the provided tubing.
Step 6: Install the Bypass Valve
The bypass valve allows you to divert water away from the softener when needed, such as during maintenance. Install the valve according to the manufacturer’s instructions.
Step 7: Connect the Overflow Tube
Finally, connect the overflow tube to the brine tank. This tube acts as a safety feature, providing an exit for water in case of a malfunction.
| Installation Steps | Description |
| Shut off water supply | Prevents water flow during installation |
| Position the water softener | Choose a suitable location |
| Connect to water supply | Attach the softener to your water line |
| Set up drainage | Connect a drain line for the regeneration process |
| Set up the brine tank | Fill with salt and connect to the softener |
| Install the bypass valve | Allows for water diversion during maintenance |
| Connect the overflow tube | Safety feature for potential malfunctions |
After the Installation: Your Next Steps

Step 1: Let the Water Flow
Now that your DIY water softener is installed, it’s time to turn the water supply back on. Do this slowly to prevent any sudden pressure build-up. Also, remember to turn the power back on for your water heater.
Step 2: Initiate the Regeneration Cycle
Next, manually start a regeneration cycle on your water softener. This process will prepare the resin bed to start softening your water. Refer to your manufacturer’s instructions on how to do this.
Step 3: Check for Leaks
Finally, inspect all the connections for any leaks. If you find any, turn off the water supply, tighten the connections, and check again.
| Post-Installation Steps | Description |
| Turn water supply back on | Slowly restore water flow |
| Start a regeneration cycle | Prepares the softener for use |
| Check for leaks | Ensure all connections are secure |
Congratulations! You’ve successfully installed your DIY water softener.
Keeping Your DIY Water Softener in Top Shape: Maintenance Tips
Maintaining your DIY water softener is just as important as installing it. By regularly checking salt levels, cleaning and re-bedding resin tanks, and replacing filters, you can ensure your softener continues to provide soft, high-quality water for your home.

Regular Salt Checks: The Lifeline of Your Softener
Your water softener’s effectiveness largely depends on its salt levels. Regularly check the salt in your brine tank and replenish it as needed. Remember, using the right type of salt recommended by the manufacturer is crucial for optimal performance.
Cleaning and Re-bedding Resin Tanks: A Little Effort Goes a Long Way
Over time, the resin beads in your softener can become coated with iron or other minerals, reducing their effectiveness. Cleaning the resin tank and re-bedding it with fresh resin can help maintain your softener’s efficiency. Filter Replacements: The Unsung Heroes
Don’t forget about the filters! These components play a vital role in removing sediment and other particles from your water. Regularly check and replace filters as per the manufacturer’s guidelines to ensure your softener continues to work effectively.
| Maintenance Tasks | Importance |
| Check salt levels | Maintains softening efficiency |
| Clean and re-bed resin tanks | Prevents mineral buildup |
| Replace filters | Removes sediment and particles |
DIY Water Softener Troubleshooting
Even the best DIY water softener can encounter issues. But don’t worry! With a little troubleshooting, you can quickly get your system back on track.
Dealing with Decreased Water Pressure
If you notice a drop in your home’s water pressure after installing your water softener, it could be due to a clogged filter or resin bed. Regular maintenance and cleaning can help prevent this issue.
Breaking Down Salt Bridges and Salt Mushing
Salt bridges or salt mushing can occur in the brine tank, preventing the softener from using the salt effectively. Regularly check for these issues and break up any salt bridges or mush you find.
Handling Resin Beads in Water Lines
Finding resin beads in your water lines can be a sign of a damaged softener tank. If this happens, you may need to replace the tank or the entire softener unit.
| Common Issues | Solutions |
| Decreased water pressure | Clean filter and resin bed |
| Salt bridges or mushing | Break up salt formations |
| Resin beads in water lines | Replace tank or softener unit |
Environmental Considerations for Your DIY Water Softener
Being mindful of the environmental impact of your DIY water softener is an important part of responsible homeownership. By considering the effects of sodium on plants and soil and exploring alternative softening methods, you can enjoy the benefits of soft water while minimizing your environmental footprint.
The Sodium Factor: Impact on Plants and Soil
While sodium-based water softeners are effective, the sodium they release into the environment can affect soil structure and harm plants. If you’re using softened water for irrigation, consider the potential impact on your garden and local ecosystem.

Going Green: Alternatives to Sodium-Based Water Softeners
If you’re concerned about the environmental impact of sodium, there are alternatives available:
- Potassium Chloride Softeners: These work similarly to sodium-based softeners but use potassium, which is less harmful to plants and soil.
- Salt-Free Softeners: These systems condition the water by crystallizing the minerals, preventing them from sticking to surfaces.
- Magnetic or Electronic Softeners: These devices alter the electromagnetic properties of the minerals, reducing their ability to cause scale.
| Softener Type | Environmental Impact |
| Sodium-Based | Can harm plants and soil |
| Potassium Chloride | Less harmful to plants and soil |
| Salt-Free | No salt released into the environment |
| Magnetic/Electronic | No chemicals or salt used |
Wrapping Up
Installing a DIY water softener is a practical and cost-effective solution to combat hard water issues in your home. From understanding the basics of water softening to the installation process, maintenance, and troubleshooting, this guide has equipped you with the knowledge you need.
Remember, while the process may seem daunting, the benefits of soft water are well worth the effort. So, roll up your sleeves and get ready to improve your water quality, one softening cycle at a time. Happy softening!